
Introduction
In one of my current developments, I needed to find a solution to display a layer to only cover a specific item, part of a scrollable area, to show the user a series of actions that could be applied to the selected item.
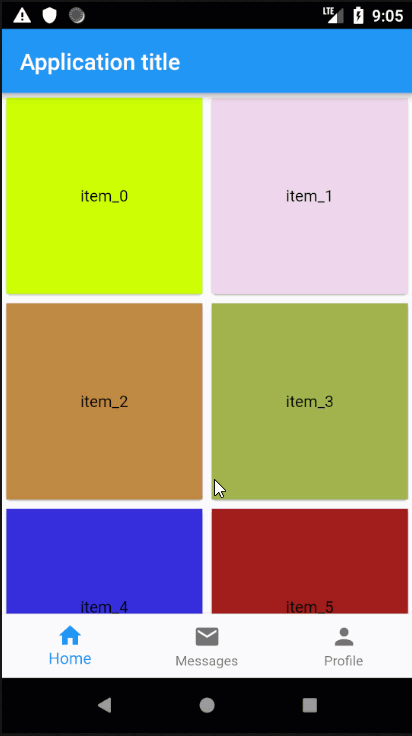
The following animation shows the objectives I needed to reach.
This short article explains the solution I implemented. Other solutions exist but let's focus on this particular one since it gives me the opportunity to introduce new topics.
Requirements
Here is the whole list of requirements:
- A part of the screen lists items in a scrollable area;
- When the user performs a "longPress" on an item, a layer needs:
- to cover the item on which the user applied the longPress
- to only cover that item, not the others
- the layer should display some actions (icons, e.g.)
- when the user taps anywhere outside the covering layer, the layer should be removed
- when the user selects an action, part of the layer, it might be possible to request to discard the covering layer, or not
- the layer cannot overflow the scrollable area
First Attempt: PopupRoute
My first idea was to mimic the way a DropDown Widget is implemented since the latter displays a "popup" on top of the screen to let the user select an item, which is more or less what I need to do.
In Flutter, a popup might be translated to a Route and the original DropDown Widget implements it via a PopupRoute.
As the documentation says: "A PopupRoute is a modal route that overlays a widget over the current route".
So if I try to implement this concept, the resulting code could look like the following:
...
GestureDetector(
onLongPress: () {
_showOverlay(context);
}
),
...
void _showOverlay(BuildContext context){
Rect position = _getItemPosition(context);
Navigator.push(
context,
_PopupItemRoute(
position: position,
),
);
}
...
class _PopupItemRoute extends PopupRoute {
_PopupItemRoute({
required this.position,
});
final Rect position;
...
bool get barrierDismissible => true;
Widget buildPage(BuildContext context, Animation<double> animation,
Animation<double> secondaryAnimation) {
return MediaQuery.removePadding(
context: context,
removeTop: true,
removeBottom: true,
removeLeft: true,
removeRight: true,
child: Builder(
builder: (BuildContext context) {
return CustomSingleChildLayout(
delegate: _PopupItemRouteLayout(
position,
),
child: ...,
);
},
),
);
}
}
class _PopupItemRouteLayout extends SingleChildLayoutDelegate {
_PopupItemRouteLayout(this.position);
final Rect position;
BoxConstraints getConstraintsForChild(BoxConstraints constraints) {
return BoxConstraints.loose(Size(position.width, position.height));
}
Offset getPositionForChild(Size size, Size childSize) {
return Offset(position.left, position.top);
}
bool shouldRelayout(_PepiteTypeSelectorRouteLayout oldDelegate) {
return position != oldDelegate.position;
}
}
This code already gives some kind of results however, it does not meet one of the main requirements: "the layer cannot overflow the scrollable area". The outcome of this source code is a layer which is on top of any other widget of the screen. Why?
Simply because the Navigator.push(...) requests the new Route to be placed "on top of everything", as the documentation says: "on top of the current route" (understand this as "on top of the current page").
So how to solve this problem?
Second Attempt: Stack
At second thoughts, I considered a Stack, as a child of a SingleChildScrollView and as a parent of the list of items I needed to show.
With this approach, we arrive to something like:
Widget build(BuildContext context){
final List<Widget> children = <Widget>[
GridView.builder(...),
];
if (_hovered){
children.add(
GestureDetector(
onTap: (){
...
},
child: Material(
color: Colors.black12,
child: ...
),
),
);
}
return Scaffold(
...
body: SingleChildScrollView(
child: Stack(
children: children,
),
),
);
}
With this solution, which is also acceptable, we can achieve what we need to do but, as you may see, this is quite complex as:
- we need to rebuild the whole content
- memorize the fact that we have hovered
- ...
and... on top of this, the code becomes very coupled to the implementation we choose.
Therefore, there must be another alternative. Let's look at the third attempt.
Third Attempt: Overlay
At third attempt, I remembered how Routes work... It is based on an Overlay with a Stack of OverlayEntry.
Therefore I had the solution: to use another Overlay which offers a way of dynamically inserting one or several OverlayEntry, on request.
Let me explain the reasoning:
- we instantiate an Overlay
- its first OverlayEntry contains the Scrolling Area
- when we need to display the layer on top of the selected item, we insert it as another OverlayEntry and we position it correctly
- this layer will be placed on top of all the OverlayEntries of THAT particular Overlay instance, and no longer on top of all Widgets.
Therefore the solution becomes something like this:
1
2class MyContainer extends StatelesWidget {
3
4 Widget build(BuildContext context){
5 return Overlay(
6 initialEntries: <OverlayEntry>[
7 OverlayEntry(
8 builder: (BuildContext context){
9 return GridView.builder(
10 gridDelegate: const SliverGridDelegateWithFixedCrossAxisCount(
11 crossAxisCount: 2,
12 childAspectRatio: 1.0,
13 ),
14 itemCount: items.length,
15 itemBuilder: (BuildContext context, int index){
16 return GestureDetector(
17 onLongPress:(){
18 _showLayer(context);
19 },
20 child: Container(
21 color: Colors.red,
22 child: Text('This is an item'),
23 ),
24 );
25 }
26 );
27 },
28 ),
29 ],
30 );
31 }
32}
33Explanation
- Line #5: We insert an Overlay as a ancestor of the Scrollable Area
- Line #6: The Overlay widget requires a list of OverlayEntry as "children"
- Lines #17-19: The intercept the longPress gesture and pass the BuildContext of the selected item to the routine that will display the layer
How to build the overlay layer?
As the requirements tell that we need to be able to dismiss the layer if the user taps anywhere on the screen (outside the selected item), we need to detect such action.
In order to achieve this, a very easy way is to create a Material widget which will expand and cover as much space as possible. When the user will tap on this Widget, we intercept the event and dismiss it.
So the code is:
GestureDetector(
  onTap: _removeOverlay,
  child: Material(
      color: Colors.black12,
      child: ...
  ),
),
How to position the overlay layer?
Now we need to build the overlay that will only cover the selected item. Therefore, we need to obtain the dimensions and on-screen position of that selected item.
This can easily be done since we have its BuildContext (see lines 16-18 in the explanation, above), as follows:
///
/// Returns the position (as a Rect) of an item
/// identified by its BuildContext
///
Rect _getPosition(BuildContext context) {
    final RenderBox box = context.findRenderObject() as RenderBox;
    final Offset topLeft = box.size.topLeft(box.localToGlobal(Offset.zero));
    final Offset bottomRight = box.size.bottomRight(box.localToGlobal(Offset.zero));
    return Rect.fromLTRB(topLeft.dx, topLeft.dy, bottomRight.dx, bottomRight.dy);
}
The second step consists in putting this layer on the screen.
In order to do this, there is a very convenient Widget, called CustomSingleChildLayout which allows to control the layout of a single child.
Between us, I could have also used a Positioned widget inside a Stack, but let's take this opportunity to introduce the CustomSingleChildLayout widget...
So, the CustomSingleChildLayout widget delegates the layout of its child to a SingleChildLayoutDelegate class which allows to:
- position the child;
- size the child.
This is exactly what we need... The code becomes something like:
GestureDetector(
onTap: _removeOverlay,
child: Material(
color: Colors.black12,
child: CustomSingleChildLayout(
delegate: _OverlayableContainerLayout(
position: position,
),
child: ...,
),
),
),
...
class _OverlayableContainerLayout extends SingleChildLayoutDelegate {
_OverlayableContainerLayout(this.position);
final Rect position;
BoxConstraints getConstraintsForChild(BoxConstraints constraints) {
return BoxConstraints.loose(Size(position.width, position.height));
}
Offset getPositionForChild(Size size, Size childSize) {
return Offset(position.left, position.top);
}
bool shouldRelayout(_OverlayableContainerLayout oldDelegate) {
return position != oldDelegate.position;
}
}
It is almost OKay but the positioning is not yet correct since we did not take the position of the container (= Overlay) into consideration.
Let's apply the necessary changes to the _showLayer(...) method.
//
// We have to remember the OverlayEntry to be
// able to remove it
//
OverlayEntry? _overlayEntry;

void _showLayer(BuildContext context){
    //
    // Retrieve the instance of the Overlay we inserted
    //
    final OverlayState overlayState = Overlay.of(context);

    //
    // Get its position on screen
    //
    final Rect overlayPosition = _getPosition(overlayState.context);

    //
    // Get the coordinates of the item and adapt these
    // coordinates to the Overlay
    //
    final Rect widgetPosition = _getPosition(context).translate(
        -overlayPosition.left,
        -overlayPosition.top,
    );

    //
    // Insert the OverlayEntry
    //
    _overlayEntry = OverlayEntry(
        builder: (BuildContext context){
            return GestureDetector(
                onTap: _removeOverlay,
                child: Material(
                    color: Colors.black12,
                    child: CustomSingleChildLayout(
                        delegate: _OverlayableContainerLayout(
                            position: widgetPosition,
                        ),
                        child: ...,
                    ),
                ),
            );
        },
    );

    overlayState.insert(
        _overlayEntry!,
    );
}

//
// Removes the overlay
//
void _removeOverlay(){
    _overlayEntry?.remove();
    _overlayEntry = null;
}
Very last thing... to make sure the layer will not overflow its Overlay container, let's simply clip the Overlay as follows:
class MyContainer extends StatelesWidget {
Widget build(BuildContext context){
return ClipRect( // <== modification we applied
child: Overlay(
initialEntries: <OverlayEntry>[
OverlayEntry(
builder: (BuildContext context){
return GridView.builder(
gridDelegate: const SliverGridDelegateWithFixedCrossAxisCount(
crossAxisCount: 2,
childAspectRatio: 1.0,
),
itemCount: items.length,
itemBuilder: (BuildContext context, int index){
return GestureDetector(
onLongPress:(){
_showLayer(context);
},
child: Container(
color: Colors.red,
child: Text('This is an item'),
),
);
}
);
},
),
],
),
);
}
}
Let's wrap it up
I have created a new Widget, called OverlayableContainerOnLongPress, with the following signature:
typedef OverlayableContainerOnLongPressBuilder = Function(
  BuildContext context, VoidCallback hideOverlay);

class OverlayableContainerOnLongPress extends StatefulWidget {
  OverlayableContainerOnLongPress({
    super.key,
    required this.child,
    required this.overlayContentBuilder,
    this.onTap,
  });

  final Widget child;
  final OverlayableContainerOnLongPressBuilder overlayContentBuilder;
  final VoidCallback? onTap;
}
child
corresponds to the Widget to be displayed on which the user could do a longPress
overlayContentBuilder
is a builder which lets you build the layer that will be displayed on top of the child on longPress. The hideOverlayCallback is the method to be invoked if you need to control the removal of the layer
onTap
callback when the user is doing a tap on the child.
The source code of this widget as well as a complete sample can be found on GitHub.
Conclusions
As it has been a while since I last posted an article with some kind of hint, I found interesting to share this little one with you.
As I said, other solutions exist but this one works for me.
Stay tuned for new articles, soon. Meanwhile, let me wish you a happy coding!