
Introduction
Sometimes, it is necessary to get access to a StatefulWidget from another Widget to perform some operations or to link two or more StatefulWidgets to realize some business logic.
As an example, suppose that you have a 2-state button, which is either on' or 'off'. This is easy to do.
However, if you now consider a series of such buttons where your business rule says: "only one of these buttons may be 'on' at a time". How do you achieve this? More complicated, imagine the case where these buttons would be part of different widget trees...
Several ways to handle this case exist and this article is going to present a couple of solutions. Some will be straightforward, some will be more complex and some will be better than others but the objective of this article is not to be exhaustive but to make you understand the general principle...
Let's start...
Basic 2-state button
Let's first write the basic code of a 2-state button. The code could look like the following:
1
2
3class ButtonTwoStates extends StatefulWidget {
4 const ButtonTwoStates({
5 super.key,
6 required this.index,
7 required this.onChange,
8 this.isOn = false,
9 });
10
11 final bool isOn;
12 final int index;
13 final ValueChanged<bool> onChange;
14
15
16 _ButtonTwoStatesState createState() => _ButtonTwoStatesState();
17}
18
19class _ButtonTwoStatesState extends State<ButtonTwoStates> {
20 //
21 // Internal state
22 //
23 late bool _isOn;
24
25
26 void initState() {
27 super.initState();
28 _isOn = widget.isOn;
29 }
30
31
32 Widget build(BuildContext context) {
33 return InkWell(
34 onTap: _toggleState,
35 child: Container(
36 width: 80.0,
37 height: 56.0,
38 color: _isOn ? Colors.red : Colors.green,
39 ),
40 );
41 }
42
43 //
44 // The user taps on the button and we want to toggle
45 // its internal state
46 //
47 void _toggleState() {
48 _isOn = !_isOn;
49 if (mounted) {
50 setState(() {});
51 }
52 widget.onChange?.call(_isOn);
53 }
54}
55Explanation:
- line 23: internal state of this button
- line 28: we initialize the state, based on the information provided to the Widget
- line 34: when we tap on the button, we call the _toggleState method
- line 48: we simply toggle the internal state of the button,
- lines 49-51: we ask the button to rebuild, making sure that the button is still there
- line 52: we invoke the callback (if mentioned)
Note about the '?.call()'
The following code: "widget.onChange?.call(_isOn);" is equivalent to
    if (widget.onChange != null){
        widget.onChange(_isOn);
    }
Basic page
Let's now create a page that contains 2 of these buttons. The code could look like the following:
1
2class TestPage extends StatefulWidget {
3 const TestPage({
4 super.key,
5 });
6
7
8 _TestPageState createState() => _TestPageState();
9}
10
11class _TestPageState extends State<TestPage> {
12
13 Widget build(BuildContext context) {
14 return Scaffold(
15 appBar: AppBar(title: const Text('2-state buttons'), centerTitle: true,),
16 body: Center(
17 child: Row(
18 mainAxisAlignment: MainAxisAlignment.center,
19 children: [
20 ButtonTwoStates(
21 index: 0,
22 isOn: false,
23 onChange: (bool isOn) {
24 debugPrint('My first button is on ? $isOn');
25 },
26 ),
27 const SizedBox(width: 8),
28 ButtonTwoStates(
29 index: 1,
30 isOn: false,
31 onChange: (bool isOn) {
32 debugPrint('My second button is on ? $isOn');
33 },
34 ),
35 ],
36 ),
37 ),
38 );
39 }
40}
41We obtain the following screen:
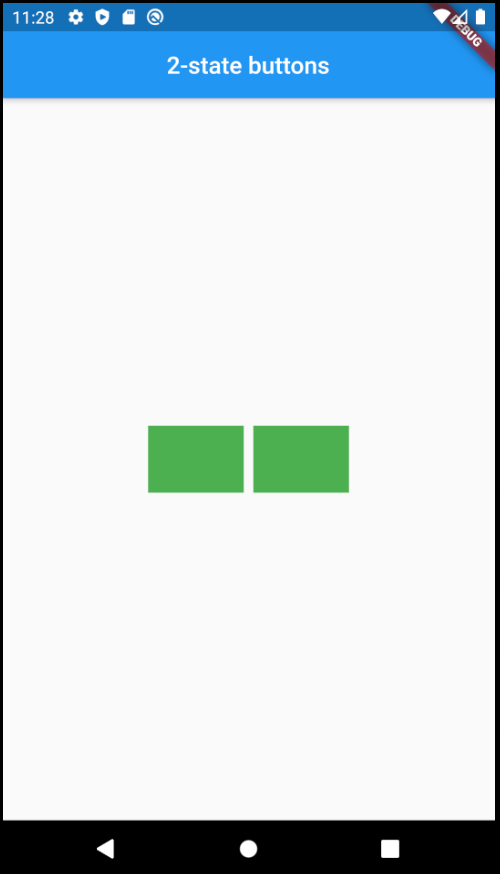
When the user taps on one of the buttons, the corresponding one's color toggles.
How to create a relationship between the 2 buttons?
Let's now assume that we need to have the following behavior: "when one button is 'on', the other is 'off'". How could we achieve this?
At first thoughts, we could update the code of the page as follows:
1
2class _TestPageState extends State<TestPage> {
3 final List<bool> _buttonIsOn = [true, false];
4
5
6 Widget build(BuildContext context) {
7 return Scaffold(
8 appBar: AppBar(
9 title: Text('2-state buttons'),
10 centerTitle: true,
11 ),
12 body: Center(
13 child: Row(
14 mainAxisAlignment: MainAxisAlignment.center,
15 children: [
16 ButtonTwoStates(
17 index: 0,
18 isOn: _buttonIsOn[0],
19 onChange: (bool isOn) {
20 _onButtonValueChange(index: 0, isOn: isOn);
21 },
22 ),
23 const SizedBox(width: 8),
24 ButtonTwoStates(
25 index: 1,
26 isOn: _buttonIsOn[1],
27 onChange: (bool isOn) {
28 _onButtonValueChange(index: 1, isOn: isOn);
29 },
30 ),
31 ],
32 ),
33 ),
34 );
35 }
36
37 void _onButtonValueChange({int index, bool isOn}) {
38 final int indexOtherButton = (index + 1) % _buttonIsOn.length;
39
40 _buttonIsOn[index] = isOn;
41 _buttonIsOn[indexOtherButton] = !isOn;
42
43 if (mounted){
44 setState(() {});
45 }
46 }
47}
48
However, despite this modification which seems logical, it does not work... why?
The problem comes from the ButtonTwoStates button which is a StatefulWidget.
If you refer to my past article on the notion of Widget - State - Context, you will remember that:
- In a StatefulWidget, the Widget part is immutable (thus, never changes) and has to be seen as a kind of configuration
- the initState() method is only run ONCE for the whole live of the StatefulWidget
So why doesn't it work?
Simply because, by simply passing a "new value" to the ButtonState.isOn, its corresponding State will not change as the initState method will not be called a second time.
How can we solve this?
Still referring to my past article (Widget - State - Context), I did only mention one overriddable method: didUpdateWidget without explaining it...
didUpdateWidget
This method is invoked when the parent Widget rebuilds and provides different arguments to this Widget (of course, this Widget needs to keep the same Key and runtimeType).
In this case, Flutter calls the didUpdateWidget(oldWidget) method, providing the old Widget in argument.
It is therefore up to the State instance to take the appropriate actions based on the potential variations between the "old" Widget arguments and the "current" Widget arguments.
...and this is exactly what we need as:
- we are rebuilding the parent Widget (line: 44)
- we are providing the children widgets with new values (lines: 18 and 26)
Let's apply the necessary modification to our _ButtonTwoStatesState source code as follows:
1
2class _ButtonTwoStatesState extends State<ButtonTwoStates> {
3 //
4 // Internal state
5 //
6 late bool _isOn;
7
8
9 void initState() {
10 super.initState();
11 _isOn = widget.isOn;
12 }
13
14
15 void didUpdateWidget(ButtonTwoStates oldWidget) {
16 super.didUpdateWidget(oldWidget);
17 if (widget.isOn != oldWidget.isOn){
18 _isOn = widget.isOn;
19 }
20 }
21
22
23 Widget build(BuildContext context) {
24 return InkWell(
25 onTap: _onTap,
26 child: Container(
27 width: 80.0,
28 height: 56.0,
29 color: _isOn ? Colors.red : Colors.green,
30 ),
31 );
32 }
33
34 //
35 // The user taps on the button
36 //
37 void _onTap() {
38 _isOn = !_isOn;
39 if (mounted) {
40 setState(() {});
41 }
42 widget.onChange?.call(_isOn);
43 }
44}
45
Thanks to line #18, the internal value "_isOn" is now updated and the button will be rebuilt using this new value.
OK, now it works, however, the whole business logic related to the buttons is taken on board by the TestPage, which works great with 2 buttons but if you now need to consider additional buttons, it might become a nightmare moreover if the buttons are not direct children of the very same parent!
Notion of GlobalKey
The GlobalKey class generates a unique key across the entire application. But the main interest of using a GlobalKey in the context of this article is that
The GlobalKey provides an access to the State of a StatefulWidget, using the currentState getter.
So, what does this mean?
Let's first apply a change to the original source code of the ButtonTwoStates to make its State public. This is very easy: we simply remove the "_" sign from the name of the class "_ButtonTwoStatesState". This makes the class public. We then obtain:
class ButtonTwoStates extends StatefulWidget {
...
ButtonTwoStatesState createState() => ButtonTwoStatesState();
}
class ButtonTwoStatesState extends State<ButtonTwoStates> {
...
}
Now, let's use the GlobalKey inside our TestPage ...
1
2class _TestPageState extends State<TestPage> {
3 final List<bool> _buttonIsOn = [true, false];
4 final List<GlobalKey<ButtonTwoStatesState>> _buttonKeys = [
5 GlobalKey<ButtonTwoStatesState>(),
6 GlobalKey<ButtonTwoStatesState>(),
7 ];
8
9
10 Widget build(BuildContext context) {
11 return Scaffold(
12 appBar: AppBar(
13 title: Text('2-state buttons'),
14 centerTitle: true,
15 ),
16 body: Center(
17 child: Row(
18 mainAxisAlignment: MainAxisAlignment.center,
19 children: [
20 ButtonTwoStates(
21 key: _buttonKeys[0],
22 index: 0,
23 isOn: _buttonIsOn[0],
24 onChange: (bool isOn) {
25 _onButtonValueChange(index: 0, isOn: isOn);
26 },
27 ),
28 const SizedBox(width: 8),
29 ButtonTwoStates(
30 key: _buttonKeys[1],
31 index: 1,
32 isOn: _buttonIsOn[1],
33 onChange: (bool isOn) {
34 _onButtonValueChange(index: 1, isOn: isOn);
35 },
36 ),
37 ],
38 ),
39 ),
40 );
41 }
42
43 void _onButtonValueChange({int index, bool isOn}) {
44 final int indexOtherButton = (index + 1) % _buttonIsOn.length;
45
46 _buttonIsOn[index] = isOn;
47 _buttonIsOn[indexOtherButton] = !isOn;
48
49 // setState(() {});
50 _buttonKeys[indexOtherButton].currentState.resetState();
51 }
52}
53 Explanation
- lines 4-7: we generate an array of GlobalKey referring to ButtonTwoStatesState
- line 21: we tell the first button which is its key
- line 30: same for button 2
- line 49: we no longer need to fully rebuild the page.
- line 50: as we are going to see here below, we call the button which needs to be reset
So, the change to be applied to the ButtonTwoStatesState code is limited to adding a new method as follows:
1
2class ButtonTwoStatesState extends State<ButtonTwoStates> {
3  ...
4  //
5  // Reset the state
6  //
7  void resetState(){
8    _isOn = false;
9    if (mounted) {
10      setState(() {});
11    }
12  }
13}
14
Explanation
- line 7: As you can see, the method is public (no "_" prefix), which is necessary to be accessed from the TestPage (as its source code does not reside in the same physical file)
- this code simply resets the state of this button and proceeds with a rebuild.
As we can see, this solution also works however, here again, the whole business logic related to the buttons is taken on board by the TestPage...
Another solution: a Controller
Another solution would consist in using a Controller class. In other words, this class would be used to control the logic and the buttons.
The idea of such a controller is that each button would tell the controller when it is selected. Then the controller will take the decision on the action(s) to take.
Here is a very basic implementation of such possible controller:
1
2class ButtonTwoStatesControllers {
3  ButtonTwoStatesControllers({
4    required this.buttonsCount,
5    this.onChange,
6    int? selectedIndex,
7  })  : assert(buttonsCount > 0),
8        assert((selectedIndex == null ||
9            (selectedIndex >= 0 &&
10                selectedIndex < buttonsCount))) {
11    _selectedIndex = selectedIndex ?? -1;
12    _registeredButtons = List.generate(buttonsCount, (index) => null);
13  }
14
15  //
16  // Total number of buttons
17  //
18  final int buttonsCount;
19
20  //
21  // Callback to be invoked when the selection changes
22  //
23  final ValueChanged<int>? onChange;
24
25  // Index of the currently selected button
26  late int _selectedIndex;
27
28  // List of registered buttons
29  late List<ButtonTwoStatesState?> _registeredButtons;
30
31  //
32  // Registers a button and returns whether
33  // the button is selected
34  //
35  bool registerButton(ButtonTwoStatesState button) {
36    final int buttonIndex = button.index;
37
38    assert(buttonIndex >= 0 && buttonIndex < buttonsCount);
39    assert(_registeredButtons[buttonIndex] == null);
40
41    _registeredButtons[buttonIndex] = button;
42
43    return _selectedIndex == buttonIndex;
44  }
45
46  //
47  // When a button is selected, we record the information
48  // and unselect the others
49  //
50  void setButtonSelected(int buttonIndex) {
51    assert(buttonIndex >= 0 && buttonIndex < buttonsCount);
52    assert(_registeredButtons[buttonIndex] != null);
53
54    if (_selectedIndex != buttonIndex) {
55      _selectedIndex = buttonIndex;
56      for (int index = 0; index < buttonsCount; index++) {
57        _registeredButtons[index]?.isOn(index == _selectedIndex);
58      }
59
60      // Notify about the change
61      onChange?.call(buttonIndex);
62    }
63  }
64}
65
I hope that the code is self-explanatory:
- the assert are there to ensure during the development time that the boundaries are respected
- lines #35-44: when a button registers itself, its State is recorded in the _registeredButtons array
- lines #50-63: when we change the selected button, we inform the registered buttons about their new state
Let's have a look at the modifications to be applied to both TestPage and to ButtonTwoStatesState:
TestPage:
1
2class _TestPageState extends State<TestPage> {
3 final ButtonTwoStatesControllers controller = ButtonTwoStatesControllers(
4 buttonsCount: 2,
5 selectedIndex: 0,
6 onChange: (int selectedIndex){
7 // Do whatever needs to be done
8 },
9 );
10
11
12 Widget build(BuildContext context) {
13 return Scaffold(
14 appBar: AppBar(
15 title: const Text('2-state buttons'),
16 centerTitle: true,
17 ),
18 body: Center(
19 child: Row(
20 mainAxisAlignment: MainAxisAlignment.center,
21 children: [
22 ButtonTwoStates(
23 controller: controller,
24 index: 0,
25 ),
26 const SizedBox(width: 8),
27 ButtonTwoStates(
28 controller: controller,
29 index: 1,
30 ),
31 ],
32 ),
33 ),
34 );
35 }
36 }
37 Explanation
The TestPage simply initializes the ButtonTwoStatesController, mentions the number of buttons to consider, which one is selected and a callback method to be invoked when the button selection changes.
This controller is passed in arguments to each button (lines 23 & 28).
ButtonTwoStatesState:
1
2
3class ButtonTwoStates extends StatefulWidget {
4 const ButtonTwoStates({
5 super.key,
6 required this.controller,
7 this.index,
8 });
9
10 final ButtonTwoStatesControllers controller;
11 final int? index;
12
13
14 ButtonTwoStatesState createState() => ButtonTwoStatesState();
15}
16
17class ButtonTwoStatesState extends State<ButtonTwoStates> {
18 late bool _isOn;
19
20
21 void initState() {
22 super.initState();
23 _isOn = widget.controller.registerButton(this);
24 }
25
26
27 Widget build(BuildContext context) {
28 return InkWell(
29 onTap: _onTap,
30 child: Container(
31 width: 80.0,
32 height: 56.0,
33 color: _isOn ? Colors.red : Colors.green,
34 ),
35 );
36 }
37
38 //
39 // The user taps on the button
40 //
41 void _onTap() {
42 widget.controller.setButtonSelected(index);
43 }
44
45 //
46 // Sets the state
47 //
48 void isOn(bool isOn) {
49 if (_isOn != isOn) {
50 if (mounted) {
51 setState(() {
52 _isOn = isOn;
53 });
54 }
55 }
56 }
57
58 //
59 // Getter for the index
60 //
61 int get index => widget.index ?? -1;
62}
63 Explanation
- line #23: At initialization time, the button registers itself ("this") against the controller which returns the status (= _isOn) of this button.
- line #42: When the user taps on the button, it informs the controller by providing its own "index"
- line #61: Convenient way for the Button to give its index number
- lines #48-56: Used by the controller to inform the button about its status.
This solution is already much better as the business logic related to the buttons has been externalized to the controller (even for the buttons themselves).
It is also much easier to add a button to the page.
Even if this solution works, this is, however, still not ideal as in a real application, buttons will most probably not all be inserted into the Widget tree by the same parent.
Provider
In order to solve this issue, let's make the controller available to any Widgets, part of the TestPage. To do this, let's use a Provider.
Let's look at the changes to apply:
1
2class TestPage extends StatelessWidget {
3 const TestPage({super.key});
4
5
6 Widget build(BuildContext context) {
7 return Provider<ButtonTwoStatesController>(
8 create: (BuildContext context) => ButtonTwoStatesController(
9 buttonsCount: 3,
10 selectedIndex: 0,
11 onChange: (int selectedIndex) {
12 // Do whatever needs to be done
13 print('selectedIndex: $selectedIndex');
14 },
15 ),
16 child: Scaffold(
17 appBar: AppBar(
18 title: const Text('2-state buttons'),
19 centerTitle: true,
20 ),
21 body: Center(
22 child: Row(
23 mainAxisAlignment: MainAxisAlignment.center,
24 children: const [
25 ButtonTwoStates(
26 index: 0,
27 ),
28 SizedBox(width: 8),
29 ButtonTwoStates(
30 index: 1,
31 ),
32 SizedBox(width: 8),
33 ButtonTwoStates(
34 index: 2,
35 ),
36 ],
37 ),
38 ),
39 ),
40 );
41 }
42}
43As we can see, the Page may now become a StatelessWidget and we do not need to pass the controller to each button.
1
2class ButtonTwoStates extends StatefulWidget {
3 const ButtonTwoStates({
4 super.key,
5 this.index,
6 });
7
8 final int? index;
9
10
11 ButtonTwoStatesState createState() => ButtonTwoStatesState();
12}
13
14class ButtonTwoStatesState extends State<ButtonTwoStates> {
15 late bool _isOn;
16 late ButtonTwoStatesController controller;
17
18
19 void initState() {
20 super.initState();
21 controller = Provider.of<ButtonTwoStatesController>(context, listen: false);
22
23 _isOn = controller.registerButton(this);
24 }
25
26
27 Widget build(BuildContext context) {
28 return InkWell(
29 onTap: _onTap,
30 child: Container(
31 width: 80.0,
32 height: 56.0,
33 color: _isOn ? Colors.red : Colors.green,
34 ),
35 );
36 }
37
38 //
39 // The user taps on the button
40 //
41 void _onTap() {
42 controller.setButtonSelected(index);
43 }
44
45 //
46 // Sets the state
47 //
48 void isOn(bool isOn) {
49 if (_isOn != isOn) {
50 if (mounted) {
51 setState(() {
52 _isOn = isOn;
53 });
54 }
55 }
56 }
57
58 //
59 // Getter for the index
60 //
61 int get index => widget.index ?? -1;
62}
63Now, it is up to the button to retrieve the controller, via a call to the Provider (line 21).
Advantages of this solution:
- the TestPage is now a StatelessWidget
- the buttons may be anywhere in the Widget tree, rooted by the TestPage, and this will work.
It is much better, however, we are exposing the ButtonTwoStatesState of the buttons to the outside world... isn't there any other solution?
Reactive
Another approach would be to let the buttons react upon any changes. This could be achieved in different ways. Let's have a look at some of them...
BLoC
Yes, I know... again the notion of BLoC and... why not? (this time I will use the Provider, to change a bit).
If you remember my articles on the topic (see here and here), we are using Streams.
The code of such BLoC could look like the following:
1
2class ButtonTwoStatesControllerBloc {
3  //
4  // Stream to handle the index of the selected button
5  //
6  final BehaviorSubject<int> _selectedButtonStreamController = BehaviorSubject<int>();
7  Stream<int> get outSelectedButtonIndex => _selectedButtonStreamController.stream;
8  Function(int) get inSelectedButtonIndex => _selectedButtonStreamController.sink.add;
9
10  //
11  // Total number of buttons
12  //
13  final int buttonsCount;
14
15  //
16  // Callback to be invoked when the selection changes
17  //
18  final ValueChanged<int>? onChange;
19
20  //
21  // Constructor
22  //
23  ButtonTwoStatesControllerBloc({
24    required this.buttonsCount,
25    this.onChange,
26    int? selectedIndex,
27  })  : assert(buttonsCount > 0),
28        assert((selectedIndex == null || (selectedIndex >= 0 && selectedIndex < buttonsCount))) {
29    //
30    // Propagate the current selected index (if any)
31    //
32    if (selectedIndex != null) {
33      inSelectedButtonIndex(selectedIndex);
34    }
35
36    //
37    // Listen to changes to emit to invoke the callback
38    //
39    outSelectedButtonIndex.listen((int index) => onChange?.call(index));
40  }
41
42  void dispose() {
43    _selectedButtonStreamController.close();
44  }
45}
46
As you can see, at initialization time:
- if we provide a valid selectedIndex, we send it to the stream
- we start listening to the stream, which will be used by the buttons (see later) and we invoke the "onChange" callback (line #39)
1
2class TestPage extends StatelessWidget {
3 const TestPage({super.key});
4
5
6 Widget build(BuildContext context) {
7 return Provider<ButtonTwoStatesControllerBloc>(
8 create: (BuildContext context) => ButtonTwoStatesControllerBloc(
9 buttonsCount: 3,
10 selectedIndex: 0,
11 onChange: (int selectedIndex) {
12 // Do whatever needs to be done
13 debugPrint('selectedIndex: $selectedIndex');
14 },
15 ),
16 dispose: (BuildContext context, ButtonTwoStatesControllerBloc bloc) => bloc.dispose(),
17 child: Scaffold(
18 appBar: AppBar(
19 title: const Text('2-state buttons'),
20 centerTitle: true,
21 ),
22 body: Center(
23 child: Row(
24 mainAxisAlignment: MainAxisAlignment.center,
25 children: const [
26 ButtonTwoStates(
27 index: 0,
28 ),
29 SizedBox(width: 8),
30 ButtonTwoStates(
31 index: 1,
32 ),
33 SizedBox(width: 8),
34 ButtonTwoStates(
35 index: 2,
36 ),
37 ],
38 ),
39 ),
40 ),
41 );
42 }
43}
44As regards the TestPage, we simply initialize and inject the ButtonTwoStatesControllerBloc.
1
2class ButtonTwoStates extends StatelessWidget {
3 const ButtonTwoStates({
4 super.key,
5 required this.index,
6 });
7
8 final int index;
9
10
11 Widget build(BuildContext context) {
12 final ButtonTwoStatesControllerBloc controllerBloc =
13 Provider.of<ButtonTwoStatesControllerBloc>(context, listen: false);
14
15 return StreamBuilder<int>(
16 stream: controllerBloc.outSelectedButtonIndex,
17 initialData: -1,
18 builder: (BuildContext context, AsyncSnapshot<int> snapshot) {
19 final bool isOn = snapshot.data == index;
20
21 return InkWell(
22 onTap: () => controllerBloc.inSelectedButtonIndex(index),
23 child: Container(
24 width: 80.0,
25 height: 56.0,
26 color: isOn ? Colors.red : Colors.green,
27 ),
28 );
29 },
30 );
31 }
32}
33And finally, for the buttons:
- lines #12-13: we retrieve the ButtonTwoStatesControllerBloc
- we use a StreamBuilder which:
- listens to the stream (line 16)
- rebuilds when a new index is emitted
- injects the index of the button when the latter is tapped (line 22)
This solution also works but all buttons are systematically rebuilt... which has impacts on the performance.
To limit the number of rebuilds, we could adapt the BLoC to only emit events related to changes (on => off, off => on) but we would then need to link the new state to the button index.
Of course, this has a price...
- we complexify the BLoC
- a new stream controller (if we really want to stick to the theory: BLoC => streams only)
- we need to maintain the state of the currently selected button
...but it is not difficult to do. This is a trade-off to do.
ValueNotifier
We could also use a ValueNotifier together with a ValueListenableBuilder.
ValueNotifier
A ValueNotifier listens to variations of an internal value. When a variation happens, it notifies everything that is listening to it. It implements a ValueListenable.
ValueListenableBuilder
A ValueListenableBuilder is a Widget which listens to notifications emitted by a ValueListenable, and rebuilds providing the emitted value to its builder method.
The solution, based on these 2 notions, consists of buttons, registering themselves to a controller, which would tell each button which ValueNotifier to listen to.
Such a solution could be written as follows:
1
2class ButtonTwoStatesControllerListenable {
3  ButtonTwoStatesControllerListenable({
4    required this.buttonsCount,
5    this.onChange,
6    int? selectedIndex,
7  })  : assert(buttonsCount > 0),
8        assert((selectedIndex == null ||
9            (selectedIndex >= 0 &&
10                selectedIndex < buttonsCount))) {
11    //
12    // Prepare the array
13    //
14    _registeredButtons = List.generate(buttonsCount, (index) => null);
15
16    // Save the initial selected index (if any)
17    _selectedIndex = selectedIndex ?? -1;
18  }
19
20  //
21  // List of the buttons' ValueNotifier
22  //
23  late List<ValueNotifier<bool>?> _registeredButtons;
24
25  //
26  // Current selected index
27  //
28  int _selectedIndex = -1;
29
30  //
31  // Total number of buttons
32  //
33  final int buttonsCount;
34
35  //
36  // Callback to be invoked when the selection changes
37  //
38  final ValueChanged<int>? onChange;
39
40  //
41  // Registers a button via its index
42  //
43  ValueNotifier<bool> registerButton(int buttonIndex) {
44    assert(buttonIndex >= 0 && buttonIndex < buttonsCount);
45    assert(_registeredButtons[buttonIndex] == null);
46
47    ValueNotifier<bool> valueNotifier = _registeredButtons[buttonIndex] =
48        ValueNotifier<bool>(buttonIndex == _selectedIndex);
49
50    return valueNotifier;
51  }
52
53  //
54  // When a button is selected, we record the information
55  // and unselect the others
56  //
57  void setButtonSelectedIndex(int buttonIndex) {
58    assert(buttonIndex >= 0 && buttonIndex < buttonsCount);
59    assert(_registeredButtons[buttonIndex] != null);
60
61    if (buttonIndex != _selectedIndex) {
62      if (_selectedIndex != -1) {
63        _registeredButtons[_selectedIndex]?.value = false;
64      }
65      _selectedIndex = buttonIndex;
66      _registeredButtons[_selectedIndex]?.value = true;
67
68      // Invoke the callback
69      onChange?.call(_selectedIndex);
70    }
71  }
72}
73
This code is very similar to our version of the first controller, earlier in the article.
The interesting parts are:
- lines #47-48: we initialize a ValueNotifier<bool> to handle the state of the button of a certain index.
- line #63: if there was a previously selected button, we mark it as not selected (= false)
- line #66: we mark the currently selected index
The simple fact of changing the inner value of a ValueNotifier (lines #63 & 68) will result in having the ValueListenableBuilder of the corresponding buttons to rebuild (see later)
As regards the TestPage, we only inject the new controller, as follows:
1
2class TestPage extends StatelessWidget {
3 const TestPage({super.key});
4
5
6 Widget build(BuildContext context) {
7 return Provider<ButtonTwoStatesControllerListenable>(
8 create: (BuildContext context) => ButtonTwoStatesControllerListenable(
9 buttonsCount: 3,
10 selectedIndex: 0,
11 onChange: (int selectedIndex) {
12 // Do whatever needs to be done
13 debugPrint('selectedIndex: $selectedIndex');
14 },
15 ),
16 child: Scaffold(
17 appBar: AppBar(
18 title: const Text('2-state buttons'),
19 centerTitle: true,
20 ),
21 body: Center(
22 child: Row(
23 mainAxisAlignment: MainAxisAlignment.center,
24 children: const [
25 ButtonTwoStates(
26 index: 0,
27 ),
28 SizedBox(width: 8),
29 ButtonTwoStates(
30 index: 1,
31 ),
32 SizedBox(width: 8),
33 ButtonTwoStates(
34 index: 2,
35 ),
36 ],
37 ),
38 ),
39 ),
40 );
41 }
42}
43The code related to the button has to be changed as follows:
1
2class ButtonTwoStates extends StatefulWidget {
3 const ButtonTwoStates({
4 super.key,
5 required this.index,
6 });
7
8 final int index;
9
10
11 _ButtonTwoStatesState createState() => _ButtonTwoStatesState();
12}
13
14class _ButtonTwoStatesState extends State<ButtonTwoStates> {
15 late ValueNotifier<bool> valueNotifier;
16 late ButtonTwoStatesControllerListenable controllerListenable;
17
18
19 void initState() {
20 super.initState();
21 controllerListenable = Provider.of<ButtonTwoStatesControllerListenable>(
22 context,
23 listen: false);
24
25 valueNotifier = controllerListenable.registerButton(widget.index);
26 }
27
28
29 Widget build(BuildContext context) {
30 return ValueListenableBuilder<bool>(
31 valueListenable: valueNotifier,
32 builder: (BuildContext context, bool isOn, Widget? child) {
33 return InkWell(
34 onTap: () =>
35 controllerListenable.setButtonSelectedIndex(widget.index),
36 child: Container(
37 width: 80.0,
38 height: 56.0,
39 color: isOn ? Colors.red : Colors.green,
40 ),
41 );
42 },
43 );
44 }
45}
46Explanation:
- lines 21-23: we retrieve the controller
- line #25: we register this button which results in getting a ValueNotifier, generated by the controller
- line #30: we use a ValueListenableBuilder which,
- line #31: listens to variations of the value of the ValueNotifier
- line #35: when the user taps the button, we notify the controller
That's it. This solution also works.
Conclusion
When we start developing in Flutter, the notion of StatefulWidget is not that easy to master, and when comes the moment to apply rules between multiple instances, it is very common to wonder how to make things done.
This article tries to give some hints through the basic example of 2-state buttons.
Dozens of other solutions exist and there is NO one single and best approach. This highly depends on your use case.
I hope that this article at least gives you some insight on this topic.
Stay tuned for new articles and as usual, I wish you happy coding!